
Steps to Creating a Student Education Plan (SEP)
Your SEP will allow you to build your course schedule semester-by-semester until graduation, ensuring you are prepared for financial aid, required tests, and housing requirements (as applicable). It is your roadmap to stay on track from program start to graduation.
- Start building your Student Education Plan (SEP) by using the Course Planning Tool located on the MyRegent Portal.
- Keep the course planning tool close by as you create your SEP.
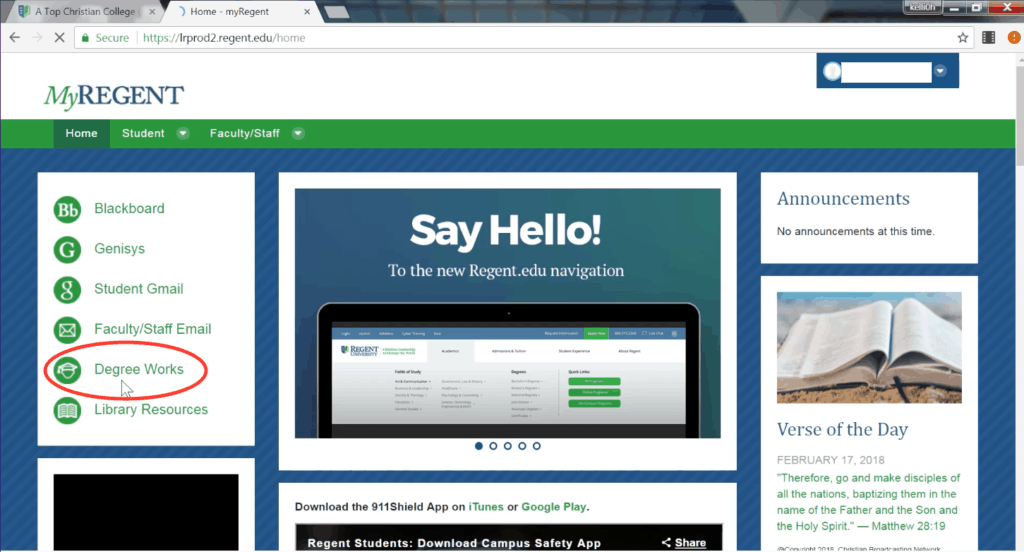
- Log in to your MyRegent portal.
- For best results, use a laptop or desktop computer, and choose Mozilla Firefox or Google Chrome as your browser.
- Once logged in, click “Degree Works” to access your student worksheet and to create your SEP.
- Use your student worksheet to review your student information, degree progress, credits applied and credits required, and to view any courses you have transferred in, taken, or have left to take.
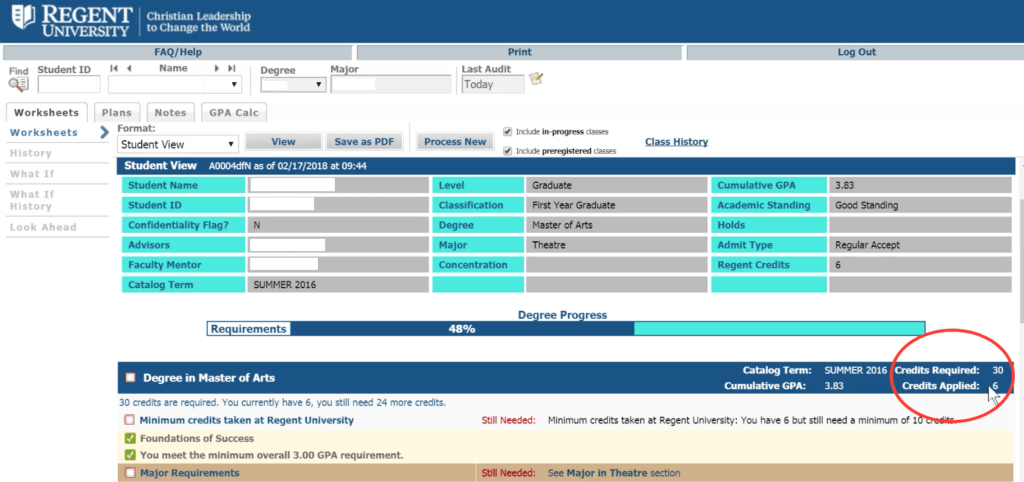
- Refer to the legend at the bottom to understand the symbols used.
*Please note: If you are a transfer student, you may have credits applied that do not contribute to your degree requirements for your particular major. This will result in you exceeding the 120 credits required minimum.
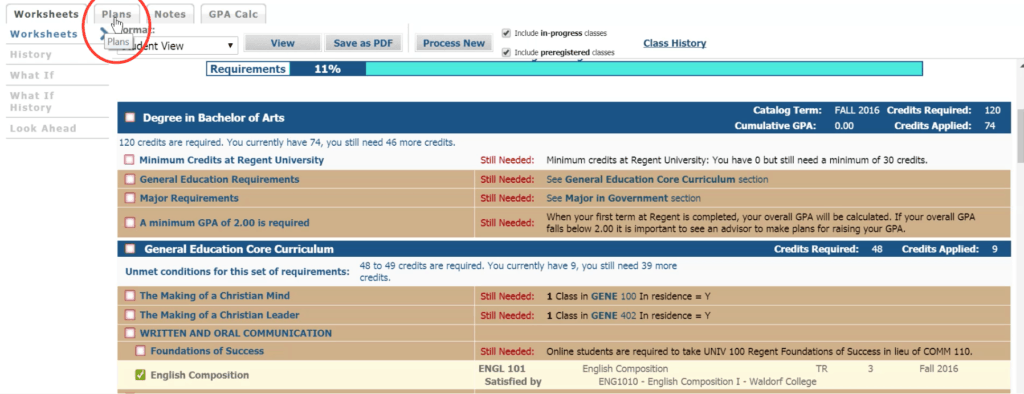
- Select “Plans” on the top menu bar.
- Click “Select Template.”

- *Only select “Blank Plan” if you are a junior or senior with only a handful of classes left to take before graduation. If you have more than 10 classes left to take, you should always choose “Select Template” to create your SEP.
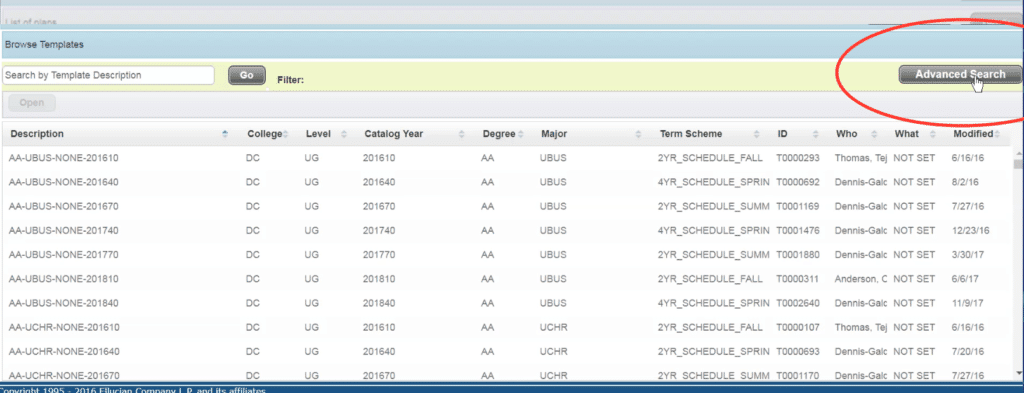
- Select “Advanced Search” in the upper right-hand corner to narrow down your options and find your degree program.
- Fill in the search categories with your degree information for College, Level, Catalog Year, Degree, and Major (scroll to the bottom for undergrad, UG, majors). Please select an option for all applicable filters to obtain the most accurate template. If you have a concentration or minor, please select Add Another Tag.
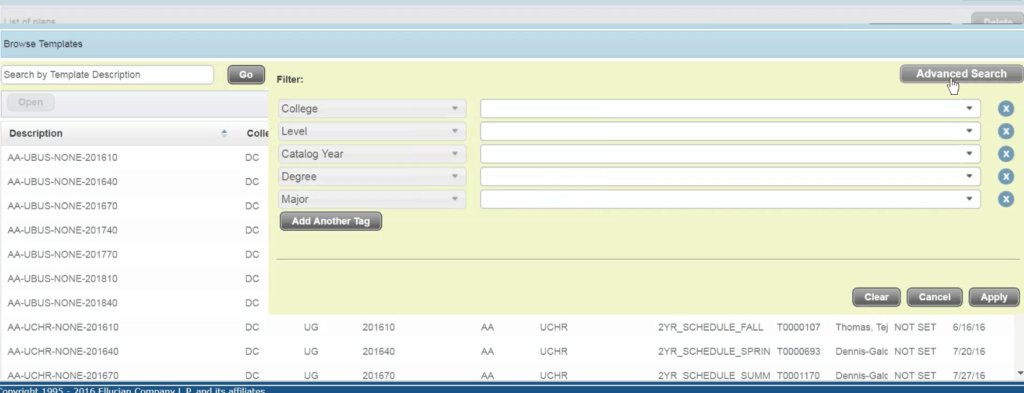
- Click “Apply” once all search categories are filled.
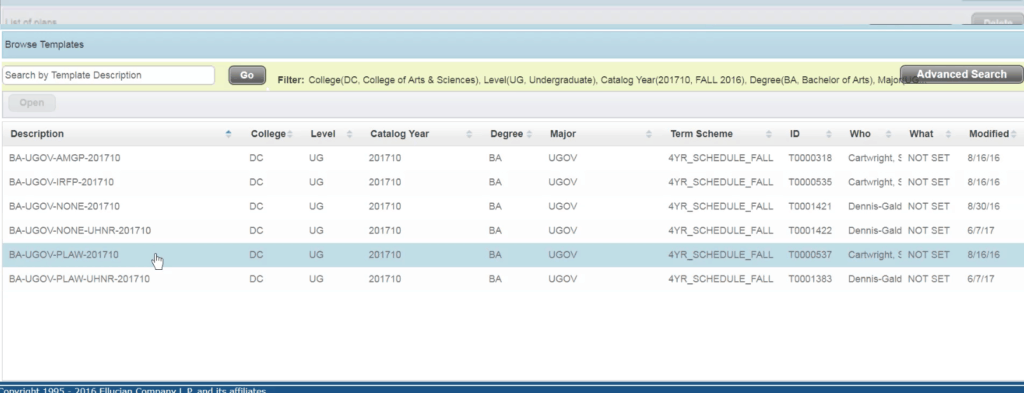
- Double click the description that fits your degree program.
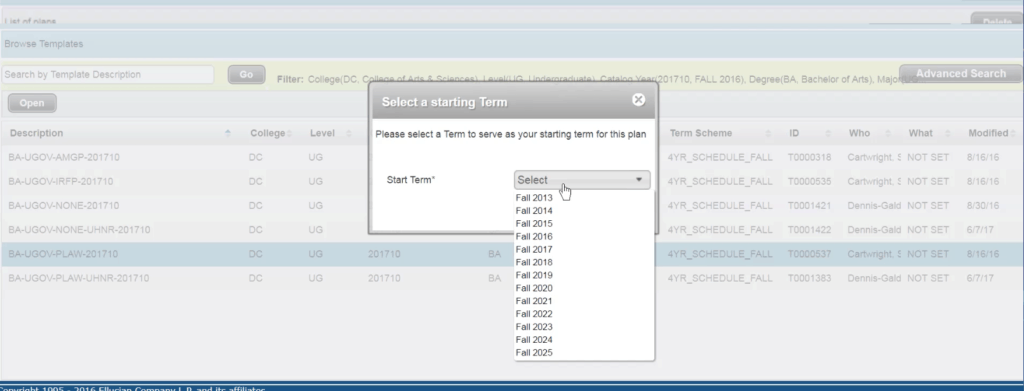
- Select your Start Term from the dropdown menu and click “Ok.”
- You are now ready to start modifying your plan!
*Please note: If you are a transfer student, you will need to remove the classes that have been applied as transfer credits. This can only be accomplished once your official transcripts have been received and you have received credits from the transferred classes.
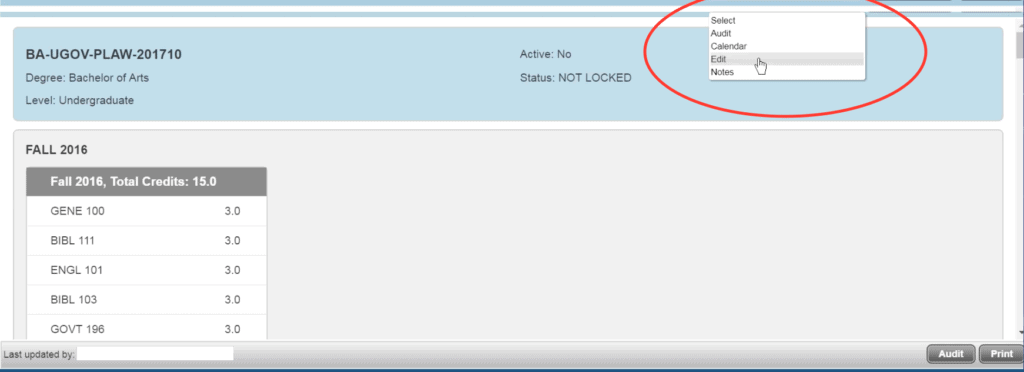
- To begin editing your SEP, select “Calendar” on the right-hand menu bar, and select “Edit” from the dropdown menu.
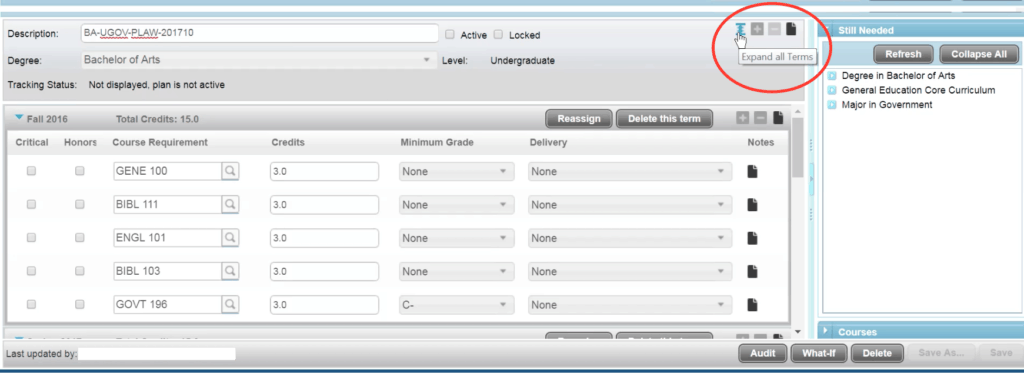
- Select the “Expand All Terms” icon in the upper right-hand corner to view your semester-by-semester suggested course sequence until graduation.
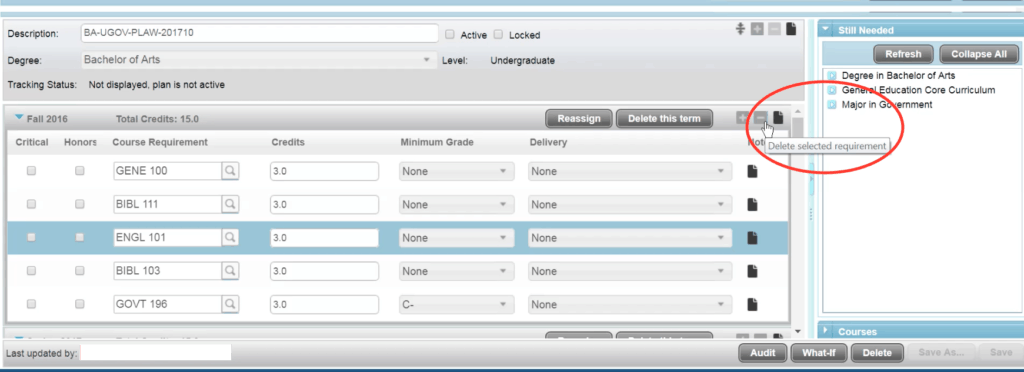
To remove a course from a term, highlight the course by clicking on it, and select the “Delete selected requirement” icon, symbolized as a minus sign.
*Make sure to save your work by clicking the “Save” button in the lower right-hand corner.

- To add a course to a term, click the “Add requirement” icon, symbolized by a plus sign.
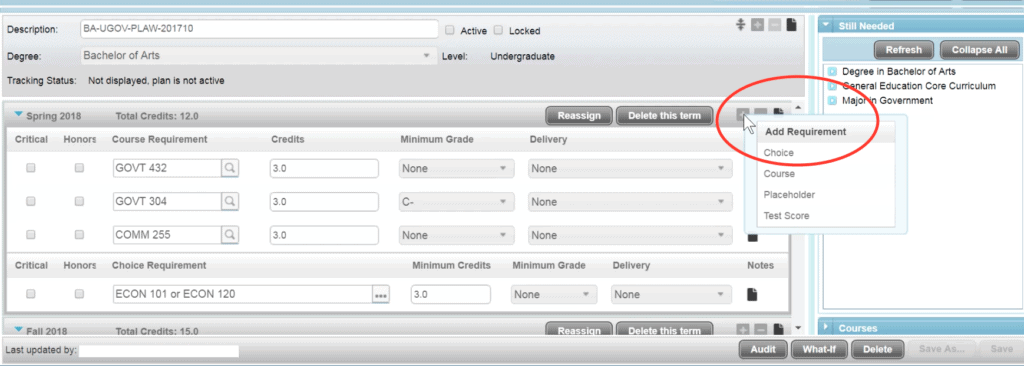
- Select the option from the dropdown menu that you prefer
- “Choice” allows you to add two or more courses as placeholders that you can modify later.
- “Course” allows you to select the exact course you would like to add.
- “Placeholder” allows you to make room for a course that you can modify and add later.
- “Test Scores” allows you to add a required test to your term schedule as a reminder.
*Make sure to save your work by clicking the “Save” button in the lower right-hand corner.

- You can reorganize your terms by dragging and dropping selected courses.
- Simply click on a course you would like to move, hold down your mouse, and drag and drop the course into the desired term.
- *Make sure the course you want to move is available in the desired term by reviewing the Two-Year Anticipated Course Rotation Schedule.
*Keep in mind, some courses have prerequisite courses. Make sure to organize your terms according to what you need to take first.
*Remember to save your work once changes have been made.

- DO: Always edit from a laptop or desktop computer, not a phone or tablet.
- DO: Continuously save your work as you make changes.
- DO: Always let your advising team know when you’ve completed a plan.
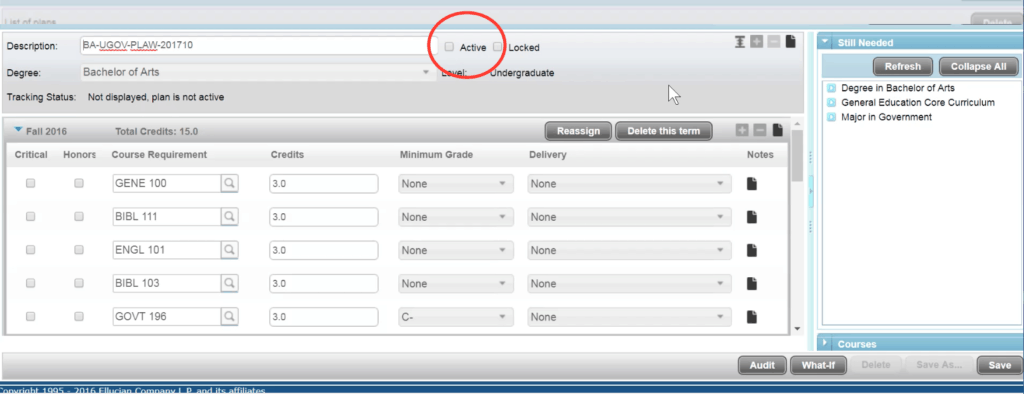
- DO: Activate your plan by selecting “Active” at the top of your screen.
- DO: Use a Word document or notepad to keep track of your course schedule and changes you would like to make.
- DON’T: Lock your plan. Keeping your plan open will allow your advisor to make any necessary modifications.
- DON’T: Conduct your course planning time in a place or time where you will be distracted.
If you need any assistance, contact University Advising at 757.352.4385 or advising@regent.edu.